Artboards
An artboard represents the app screen or the website page you are going to design. It’s the white area where the actual design objects are going to be drawn.
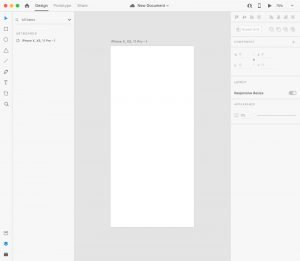
Each .xd file can contain a huge amount of artboards, as they are all positioned in a massive 50,000 x 50,000 px canvas (the grey background area, also called “pasteboard”).
You can choose the size of your artboard from a list of the most common mobile, tablet, desktop and wearables screen sizes, or you can define your own custom size.
For those designers coming from Photoshop and now getting into Adobe XD: forget about a different .psd file for each page you are designing. In Adobe XD, you can design all pages and/or screens of your website/app as artboards in the same .xd file.
Creating a new artboard
You can create a new artboard in 2 ways:
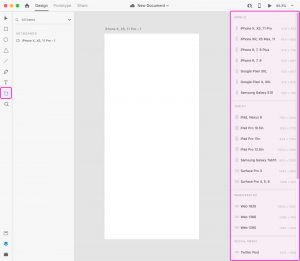
• via the Start window, which is displayed when you launch Adobe XD. You can either select a preset or define your own artboard size.
• using the Artboard tool, which you can activate from the left toolbar or by using the A key on the keyboard. Once you have this tool selected, you will see the list of available screen sizes on the right.
You just need to select one and then click on the canvas, wherever you want your artboard to be created.
Renaming artboards
You can rename an artboard by double clicking on its title, just above the top left border. You can also do it from the layers panel.
Selecting and changing artboards properties
You can select your artboards in 4 different ways:
• by clicking on the artboard title
• by using the Select Tool and double clicking on the artboard background
• by using the Select tool and marquee-select one or more artboards (make sure to draw the selection area all over the entire artboard perimeter, or it won’t get selected)
• by selecting it via the layers panel
Once an artboard is selected, its properties will be displayed in the property inspector on the right.
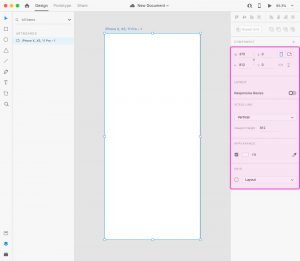
• In the first section on top, you can change the artboard size and screen orientation (portrait or landscape).
• In the “Layout” section, you can enable the Responsive Resize feature.
• In the “Scrolling” section, you can enable or disable the vertical scrolling feature: if enabled, once you preview your design on your computer or on mobile via the Adobe XD app, your artboard will be scrollable vertically past the “Viewport height” pixel value.
If you are using one of the presets screen sizes, my suggestion is to always use vertical scrolling and never change the “Viewport height” value. Only disable the vertical scrolling if the dotted horizontal line is bothering you while designing.
• In the “Appearance” section, you can change the fill of your artboard.
• In the “Grid” section, you can enable a grid for your artboard and, if needed, change its color and spacing.
You can save the changes you made to your grid (by clicking on the “Make Default” button) so that the same grid style will be automatically applied to your future projects.
Using a grid is very helpful when it comes to aligning objects in your designs.
Moving and aligning artboards
You can easily move an artboard by clicking on its title and dragging it to the new desired location on the canvas.
If your artboards are not properly lined up and you feel like you want to tidy up your canvas, just select all the artboards you want to align and use the align buttons at the top of the property inspector.