Gradients
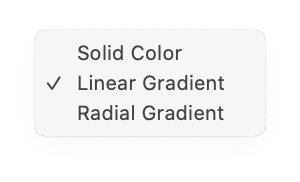 A gradient is a combination of 2 or more colors blending into each other, a color technique used quite often in UI design recently. You have two types of gradients to choose from: Linear Gradient and Radial Gradient.
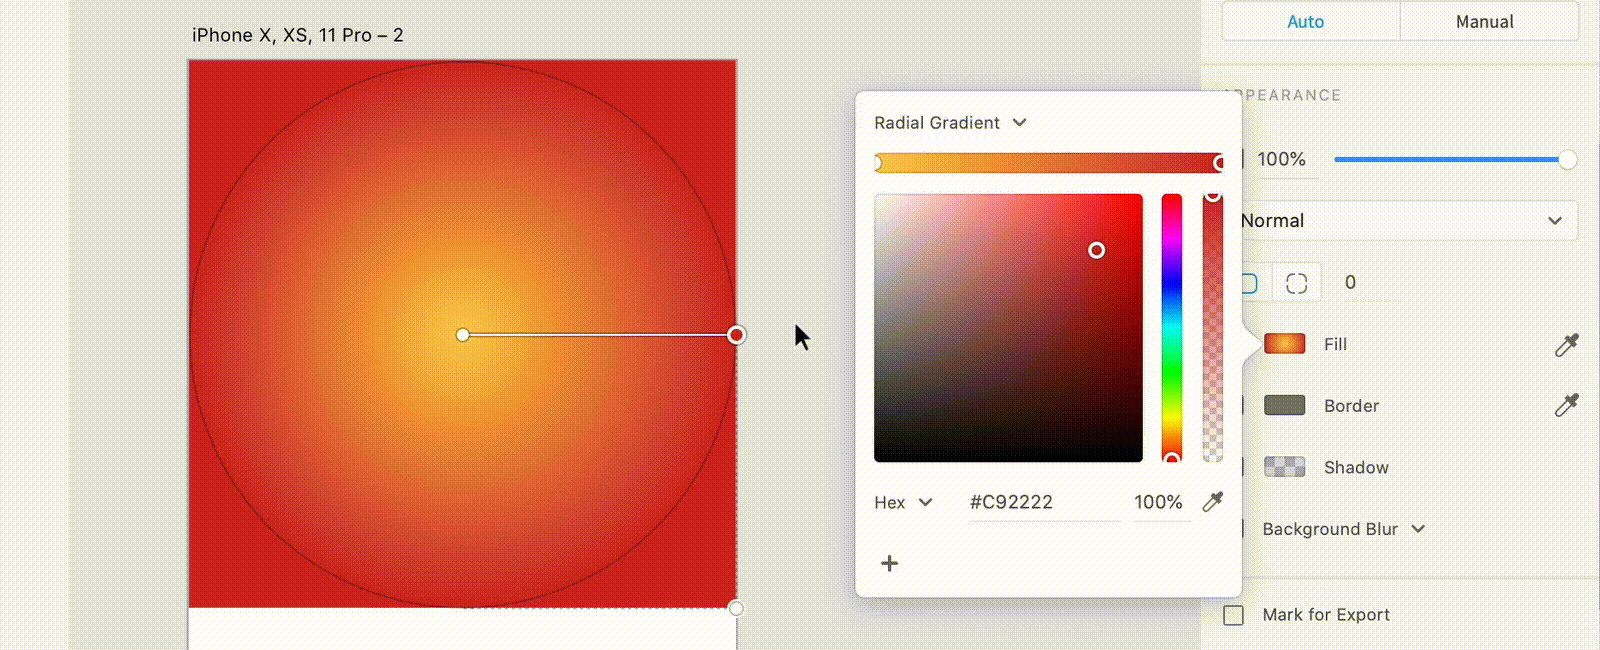
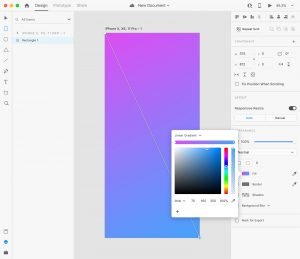
When you select “Linear Gradient” from the dropdown at the top of the color picker, a horizontal stripe will be displayed just below it, where you will be able to preview and edit your gradient.
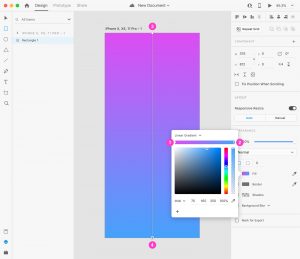
The two small circles that you see at each opposite side of the gradient stripe (1 & 2), are the two colors currently used in the gradient.
If you want to change those colors, you have to click on one of the color stops and select a different color from the color picker.
Some color stops (3 & 4) are also displayed in the gradient editor that appears on the object your gradient is applied to.
You can change the color of your gradients from there too, and you can also change the gradient direction, by moving the color stops in different directions until you reach the desired result.
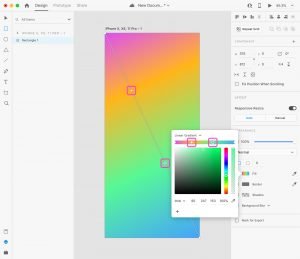
Adding colors to a gradient
By default, a gradient has 2 color stops, but you can add more colors if you want: just click on the gradient stripe in the color picker. Each time you click, a new color stop will be created. The new stop will immediately be created also in the gradient editor on top of your object.
Use the corner handle to easily change the origination point and angle of a radial gradient.
Removing colors from a gradient
If you want to remove a color stop from your gradient, you can do that in 2 ways:
• in the gradient stripe on top of the color picker, click on the color stop you want to remove and drag it outside of the color picker area.
• in the gradient editor on top of your object, click on the color stop you want to remove and hit the Delete key on your keyboard.