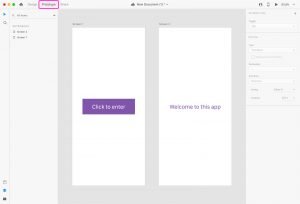
Prototyping
The Prototype mode is an amazing feature which sets Adobe XD apart from other design tools.
In this mode, you can easily create an interactive prototype of what you are designing by simply connecting the artboards included in your web or mobile project, choosing a type of transition and previewing the final result on your computer or on a mobile device.
This allows you to test and validate the navigation, usability and overall user experience of your mobile app or website before you start with development, avoiding fundamental UX design flaws down the line which might cost you more time and money to fix.
1. To create a prototype, you first need to switch to Prototype Mode by using the little toggle on the top left of the page. You will notice that all the design related toolbars and features are not accessible anymore.
2. Now click on an artboard you want to be part of your prototype. You will notice that a little home icon appears at the top left of your artboard.
If you want this screen to be the first screen of your prototype, click on the home icon. It will turn blue, meaning that this will be your home screen, the first one appearing when the prototype is launched or shared.
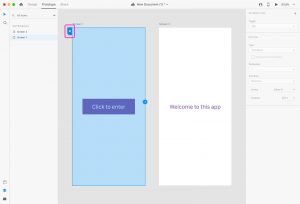
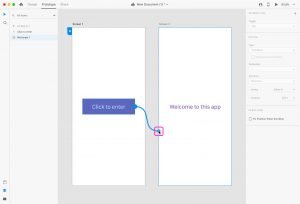
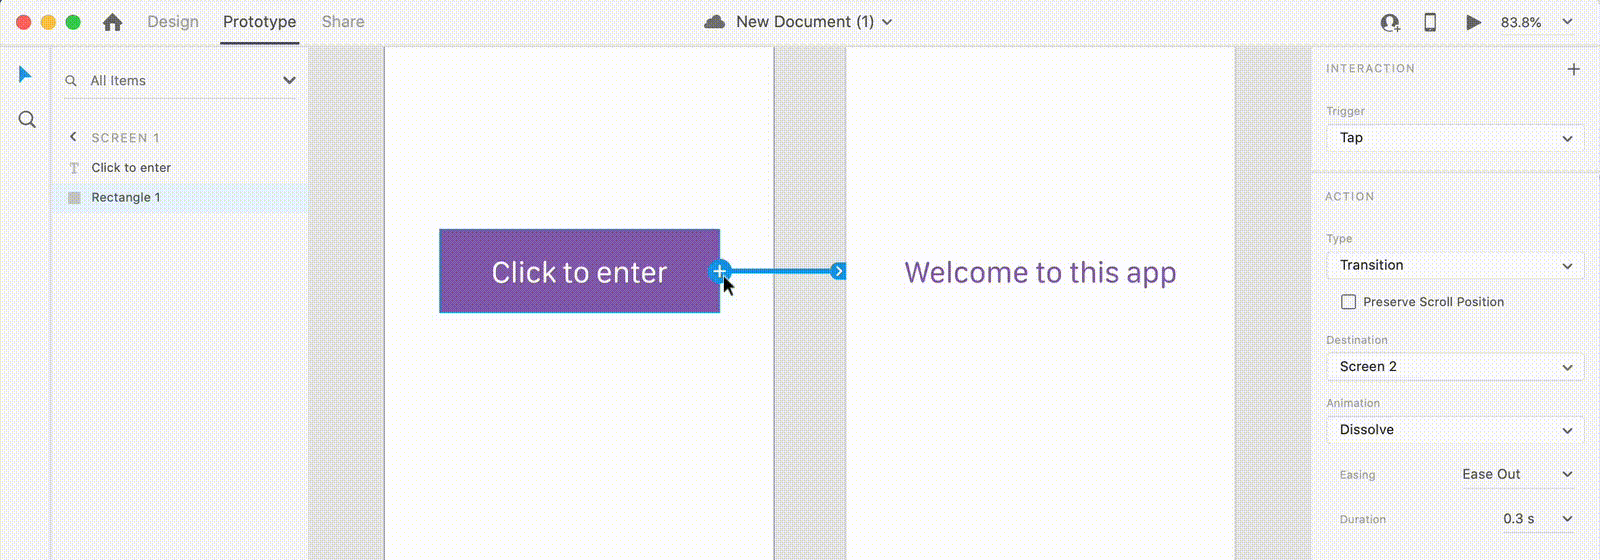
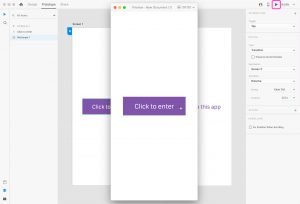
3. Now let’s say you want to connect the button on the first screen to the screen next to it , and create an interaction between the two.
Select the button by clicking on it directly on your artboard or from the layers panel on the left. (note: if your object is a layer group, make sure you select the entire group and not just one of its individual layers).
The object will be highlighted in blue, and a little arrow handle will be displayed on the right side of it.
Click on this handle, drag the connecting line which will be displayed and release the mouse on the screen you want to connect to the button.
4. At this point, the settings of your interaction will show up in the Property inspector.
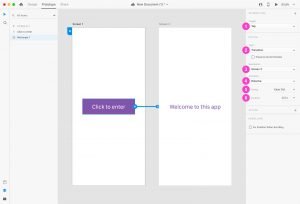
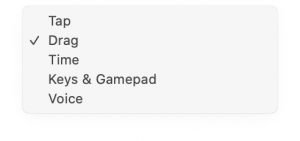 (1) Trigger: set the action that would trigger your interaction. Choose between Tap, Drag, Time, Keys & Gamepad and Voice.
You can add multiple triggers between two elements. To do so, use the blue “+” button on the artboard or click “+” in the Property Inspector. Keep in mind that you can have only one Tap trigger per object.
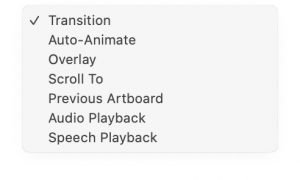
(2) Action Type: set the type of effect that your trigger should activate.
- Transition: choose from a variety of animation options for your interaction.
- Auto-Animate: Adobe XD auto-animates your effect. Create exiting fade-in, fade-out effects, swipe and drag effects, and more. You can learn more about animations in the next chapter.
- Overlay: create slide effects. Perfect to create drop-down menus, slide-in keyboards, and more.
- Scroll To: create anchor links and easily scroll to a specific section on the artboard.
- Previous Artboard: link an artboard with the previous one.
- Audio Playback: set a specific sound to be played for your interaction.
- Speech Playback: set a specific word or phrase as to be played for your interaction.
(3) Destination: this is the screen we are connecting our object to. You generally do not need to change this as it picks up automatically the target screen when you connect the two screens together. 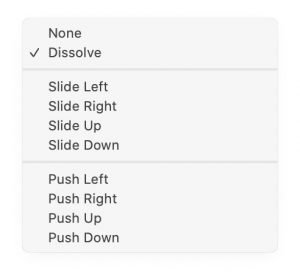
(4) Animation: choose from a bunch of different animation effects which you should change depending on the actual flow of your prototype. If for example you are prototyping the opening of a sidebar menu on a mobile app, triggered by the tap on a hamburger menu icon on the top left of the screen, you should use a “Slide right” transition.
(5) Easing: Choose from a variety of easing effects: Ease Out, Ease It, Ease In-Out, Snap, Wind Up or Bounce. Feel free to play with it.
(6) Duration: This setting defines how long the chosen transition between the connected screens will last. I am a fan of fast transitions so I generally use 0.2s or 0.4s.
After you are done changing these settings, or if you don’t want to change them at all, just press ESC or click somewhere on the grey canvas and your connection will be completed.
A couple more tips:
• If you want to review all the connections a specific artboard has, just click on its title: all connections to other screens will be displayed.
• If you made a mistake and want to delete a connection between two screens, just drag one of the two connecting handles on the grey canvas, or click on it and then press DELETE on the keyboard.
• If you want to change the target screen of a connection, you can do it through the “Target” dropdown menu, or you can just drag the destination handle to a different screen.
• You can copy and paste interactions from one object to another. If for example you have a button linking to a specific screen, with a specific transition and duration, you can copy this exact interaction and apply it to another button. To do that, copy the first button, then select the second button, right-click on it and select “Paste Interaction”
Preview your prototype
You can preview the XD prototype you just created by clicking on the “Play” icon at the top right of the screen.
A preview window will popup and the currently selected artboard will be displayed. You can now click on the objects you connected and navigate through your prototype.
In the same window you can also record a video of your prototype, which you can then share with your clients, coworkers or stakeholders.
To do that, just click on the little record icon at the top right side of the preview window (a timer with the video duration will start). Do all the actions you want to record in the video and then click on the same icon to stop recording and save it (in .mp4 format).