The interface
When you launch Adobe XD, a “start window” will pop up.
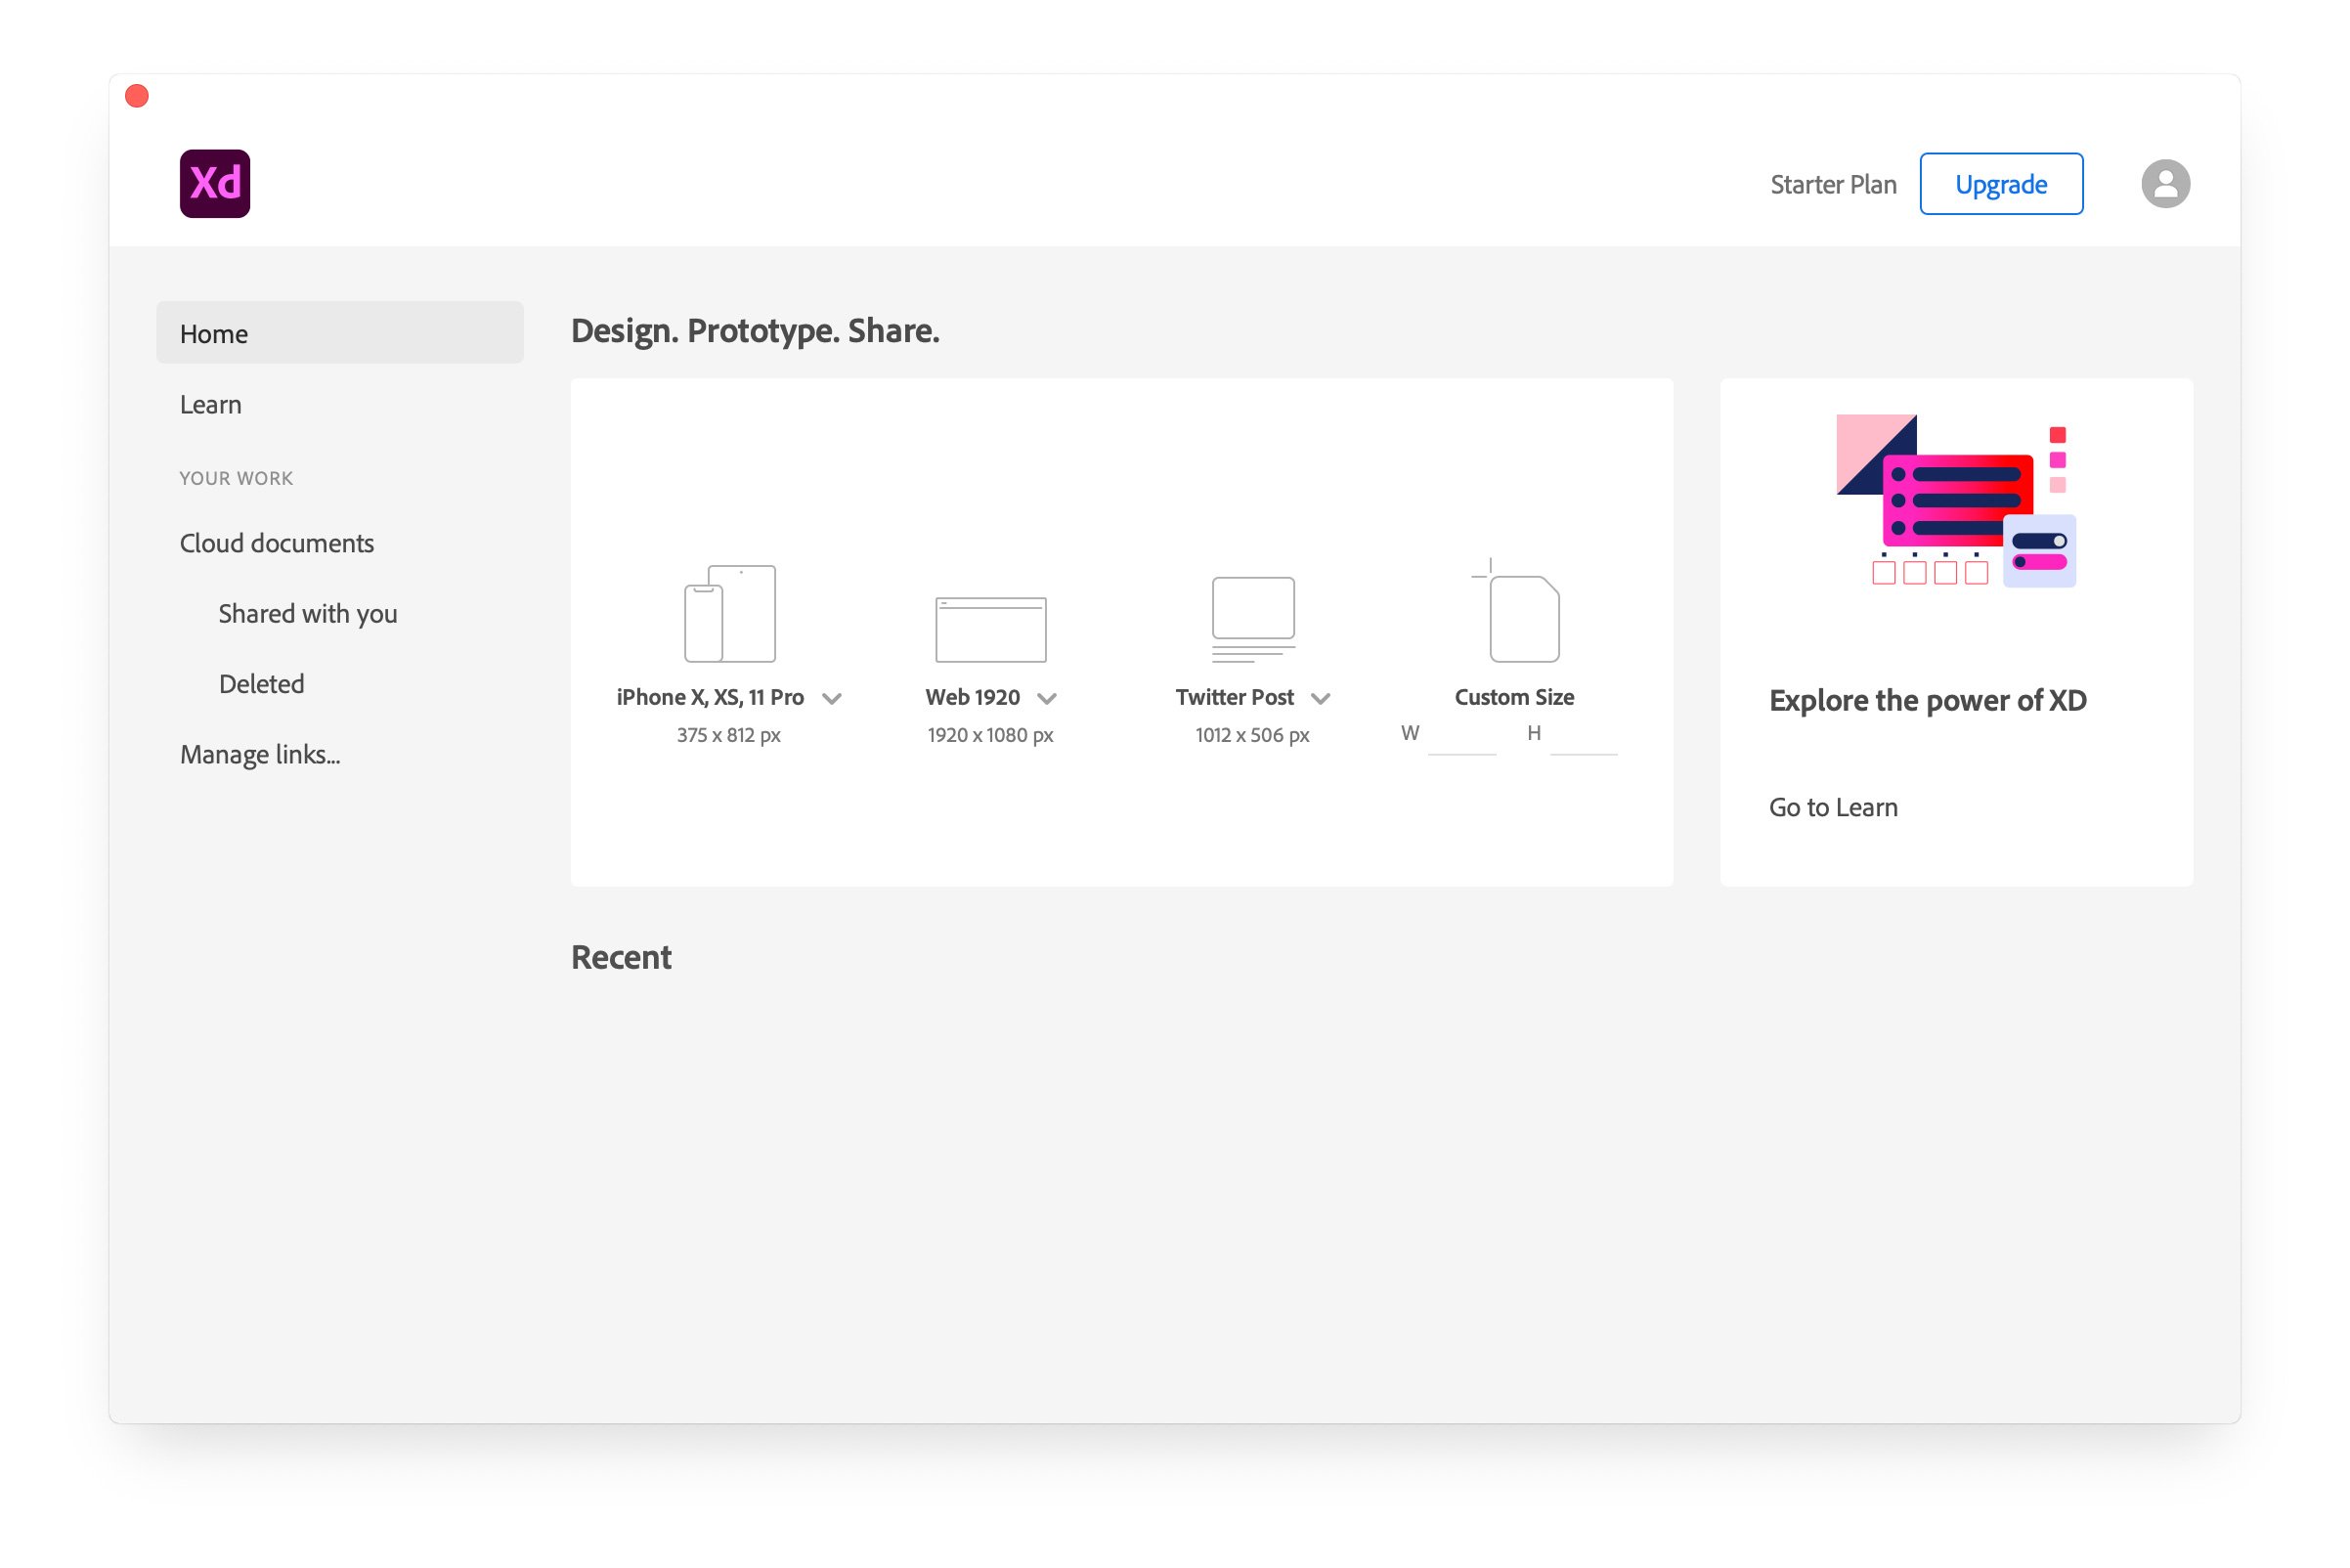
Here you can choose the size of your artboard, which represents the screen of the app or the page of the website you are going to design. You can also quickly open files you worked on recently, start a tutorial or access UI kits and other resources.
Once you choose an artboard to work with, you will see the main XD workspace. It’s a pretty basic and minimalistic user interface, but very functional. It allows you to perform the most common actions with just a few clicks.
These are its main areas:
Menu bar

At the very top of the screen we have the classic Mac OS or Windows menu bar. Not really a part of the Adobe XD’s UI, as every application has it.. anyway from here you can do basic stuff like saving and opening files, exporting assets, and pretty much every sort of operation available on Adobe XD.
You can explore and use all of these options from this menu, but it would be better if you learned all the most common shortcuts so that you can be more productive with XD. We will see them in the following chapters.
Top horizontal panel
![]()
On the left, we have the “Design / Prototype / Share” switch (1).
When you are in Design mode you can make all those changes impacting the visual side of your project.
When you are in Prototype mode, you’ll be able to give life to your designs and create an interactive prototype by connecting the screens or pages of your project.
When you are in Share mode you can share your prototype with your clients, team members or stakeholders, in order to get direct feedback on it without having to go through emails or chats.
On the right side, we can find the multi-editing feature (2), which allows multiple designers to access the same Adobe XD document enabling real time collaboration.
The little phone icon next to it (3) enables the real time preview feature, allowing you to preview your project on your mobile device by using the Adobe XD app, available for both iOS and Android. This feature works extremely well and shows you exactly how your design looks on a real device.
Next to it, we have a little play icon (4) which allows you to preview your project directly on your computer.
Finally, you can find the zoom dropdown menu (5), which I personally never use as we already have a zoom tool on the left side of the screen (which works great). This element is useful to quickly check what’s the current zoom level, but I never use it to change the zoom.
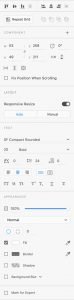
Left toolbar
![]() Here we have all the main tools available in Adobe XD.
Here we have all the main tools available in Adobe XD.
From the top:
• Select tool (also accessible by using the V key shortcut on the keyboard)
• Rectangle tool (R)
• Ellipse tool (E)
• Polygon tool (Y)
• Line tool (L)
• Pen tool (P)
• Text tool (T)
• Artboard tool (A)
• Zoom tool (Z)
And then at the bottom:
• Assets panel
• Layers panel
• Plugins panel
I suggest you learn by heart the shortcuts above as soon as possible. You will use most of these tools all the time, and the shortcuts will greatly speed up your workflow.
Right hand panel (property inspector)
In this panel you can find several settings allowing you to view or change the properties of your objects:
• alignment options
• save component
• repeat grid
• combining options (boolean operators)
• objects size & positioning
• scrolling options
• responsive layout
• text styling
• opacity
• rounded corners
• fills
• borders
• shadows
• blurs
In the following chapters we will see in detail all of the tools, features and options mentioned so far.