Selecting and moving objects
Before making any change to an object, you first need to select it.
Selecting objects is the operation that you are likely to do more often in Adobe XD. Literally all the time!
As explained in the previous chapter, you can also select objects from the Layers panel, but the best way to do that is using the Select tool, which you can activate by clicking on the first icon on top of the left toolbar, or using the letter V on the keyboard (learn this shortcut!).
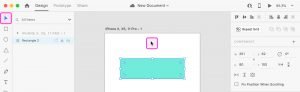
Once the Select tool is active, your mouse cursor will change to a pointing arrow and you will be able to select a single object by clicking on it.
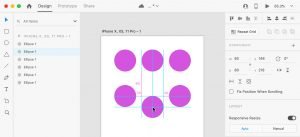
When an object is selected, you will see a blue border and some rounded handles around it.
Selecting multiple objects
If you want to select multiple objects, there are few ways you can achieve that:
• you can click and drag from an empty area of your artboard and select everything that fits in the selection rectangle (aka “marquee-select”)
• hold the SHIFT key on your keyboard and click on only the objects you want to select

• hold the SHIFT key and select multiple consecutive objects in the layers panel
• hold the CMD (Mac) / CTRL (Win) key and select multiple objects in the layers panel by clicking on them, even if not consecutive
Selecting objects within layer groups
Things get a bit trickier when you want to select objects included in layer groups.
If you click only once on a layer group, the whole group will be selected, so if you want to select a layer (or layer group) included in a parent group, you need to double click on it. Depending on how “deep” it is into the group, you might have to double click a bunch of times until you get to select it.
In case you have a lot of nested layer groups and you want to select a specific layer right away (regardless of its depth in the layer groups structure), just hold CMD (Mac) or CTRL (Win) and click on the layer. It’s a big timesaver, it will save you a lot of double-clicking!
Moving objects
You can move an object by selecting it and dragging it with the mouse to the new desired position.
Very often in UI design, you will need to move an object while keeping the same vertical or horizontal axis. To do that hold SHIFT and drag the object (very important!)
You can also move an object just by using the keyboard’s arrow keys. Each tap on the arrow keys will move the object by 1px, but if you hold SHIFT, it will be moved by 10px.
Aligning with Smart Guides
As you move objects around your artboards, Adobe XD will automagically show some snap guides, which are a great help when it comes to positioning and aligning your objects.
There are 2 types of guides:
• blue guides: showing you when an object is aligned with other objects or when it’s centered vertically and horizontally in the middle of the artboard or the parent object containing it.
When these guides are displayed, the object will snap automatically to them and will help you positioning them.
• pink guides: showing you the distance in pixels between adjacent objects and artboard edges.
You can also display these pink guides when you are not moving an object, if you just want to measure its distance from other objects.
Just select the object and press the ALT key.
By default, it will show you the distance from the artboard edges.
But if you hover the mouse over another object in your artboard, XD will show you the distance between this object and the object originally selected.